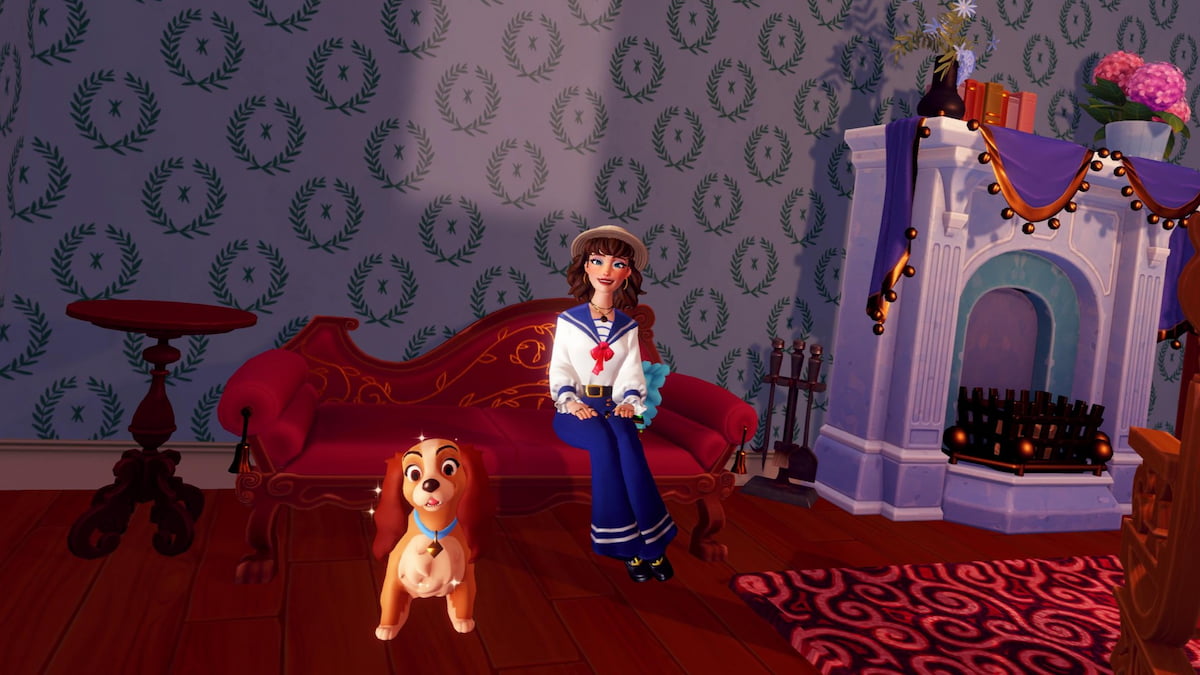
Lady and Tramp are quite content with their new life in the village, but their home could use a bit of help in Disney Dreamlight Valley. This doggy duo is hoping for some additional decor to make the place truly feel like home, and you’ll need to tackle the Portrait of a Lady quest to help them.
You have to go on a couple of scavenger hunts for the items they want, do some crafting, and seek help from others to get through this one. It’s certainly a pretty daunting task to tackle on your own, so here’s a complete walkthrough for the Portrait of a Lady quest in Disney Dreamlight Valley.
Table of contents
- How to complete Portrait of a Lady in Disney Dreamlight Valley
- Find the Posh Furniture in the Lady and the Tramp Realm
- Place the Posh Furniture in the photo shoot setup
- Ask around about items for the photo shoot
- Find all the items for the photo shoot
- Gather materials to repair the Antique Camera and the Spotlights
- Repair the photography supplies at a Crafting Station
- Place the Antique Camera and Spotlights near the photo shoot setup
- Place the Lady and Tramp Portrait Photo Shoot
- Place the Canine Family Portrait on a wall in Lady and Tramp’s House
How to complete Portrait of a Lady in Disney Dreamlight Valley
Find the Posh Furniture in the Lady and the Tramp Realm
Your first task is to locate four Posh Furniture items from around the Lady and the Tramp Realm. This is one of the toughest parts of the quest, as the Realm is fairly large and dark, so finding each one can be tricky. Here’s what you need to find and where to look for each item.
- Posh Chair – Turn right just after entering the Realm to enter the alley area behind the white fence. Head back to the corner to find the Posh Chair leaning up against some barrels.
- Posh Curtain Stand – From the Realm entrance, walk straight to the end of the alley. Make a sharp right at the end and look at the wall right on the other side to spot the Curtain Stand leaning up against it.
- Posh Curtains – Walk straight ahead upon exiting the Realm entrance. Just before you reach the end of the alley, look right to spot a sparkling green trash can. Interact with it to open it and claim the Posh Curtains from inside.
- Edwardian Portrait Frame – From the Realm entrance, walk forward a few feet, then turn right. Look to your left to find a crafting station. The Edwardian Portrait Frame is leaning up against two barrels right next to it. This is also the same alley area where you may have already found the Posh Chair.
Place the Posh Furniture in the photo shoot setup
With all four items gathered from the Lady and the Tramp Realm, head back to the valley, then venture to Lady’s house to chat with her. Then, walk over to the rug area in front of the fireplace and interact with the sparkling spot to place the three Posh Furniture items you found. The Edwardian Portrait Frame isn’t posh, so hang onto it for now.
Chat with Lady once the furniture has been placed to see what she thinks of it. Things aren’t looking quite right for the photo shoot just yet, so you now need to seek out some additional items to make it really pop.
Ask around about items for the photo shoot
Exit Lady and Tramp’s house, then meet up with Joy, Alice, and Goofy to ask each villager for items that can be used in the photo shoot. All three characters have some useful items, but they’ve lost them, so you have to embark on another scavenger hunt to recover them.
Find all the items for the photo shoot
It’s now time to find all the items for the photo shoot. They’re hidden all around the valley, so here’s what you need to gather and where to go searching for all of it.
- Four Broken Photo Shoot Spotlights stuck in rocks in the Vitalys Mines. The entrance to the Vitalys Mines can be found near the northern edge of the river that runs through the Sunlit Plateau biome. Once you’re inside, look left to find two rocks you can break. Then, turn slightly right and walk forward a few feet to find the other two. After mining all four, you’ll have the four Broken Photo Shoot Spotlights you need.
- One Broken Antique Camera in the Glade’s river. Head over to the Glade of Trust biome. Then, search around the river that runs through the middle of this area for a golden ripple spot with a red Broken Antique Camera sticking up out of it. The exact spawn spot for this item varies for all players, but it will always appear somewhere in this river.
- One Antique Camera Lens in Mickey’s secret room in the Dream Castle. Enter the Dream Castle, then turn right and walk past the potted plants to find the entrance to Mickey’s secret room. Inside, walk forward to the back of the first room, then look left to find the Antique Camera Lens sitting on the ground in front of the table.
Gather materials to repair the Antique Camera and the Spotlights
Two of the items you found are broken, so you now need to obtain the required supplies to fix them.
- Five Tinkering Parts – Can be crafted using two Iron Ingots.
- Three Hardwood – Can be found on the ground near trees around the Forest of Valor, Glade of Trust, Sunlit Plateau, and Frosted Heights biomes. If you have the Wishblossom Ranch DLC, it also spawns around Pixie Acres. Kristoff also sometimes sells it at his stall, and you can remove tree stumps with your Royal Shovel to obtain some.
- Four Glass – Can be crafted using five Sand and one Coal Ore. Kristoff’s stall also sometimes has Glass available for purchase.
Repair the photography supplies at a Crafting Station
Once you have the required materials, head to a crafting station. Then, switch over to the Furniture tab and select the Antique Film Camera and Photo Shoot Spotlight items to make. Now that they’re crafted, meet Lady back at her house.
Place the Antique Camera and Spotlights near the photo shoot setup
Inside Lady’s house, approach the sparkling area in front of the fireplace, which is the same region where you previously placed the Posh Furniture. Interact with it to place the Antique Camera and Photo Shoot Spotlights. Then, chat with Lady to start the portrait shoot.
Place the Lady and Tramp Portrait Photo Shoot
Exit Lady and Tramp’s house, open Furniture mode, select Lady’s quest icon, and place the Lady and Tramp Portrait Photo Shoot item anywhere in the valley. Then, snap a picture with Lady and Tramp, and talk to Lady to see what she thinks.
Place the Canine Family Portrait on a wall in Lady and Tramp’s House
Now that you’ve got a stunning new picture for the iconic doggy duo, interact with the wall to the left of the fireplace. Transfer the Canine Family Portrait to hang up the picture of Lady and Tramp. Then, chat with Lady to see what she thinks. As soon as you do, the Portrait of a Lady quest will be complete.
The post Portrait of a Lady quest walkthrough in Disney Dreamlight Valley appeared first on Destructoid.
Star Trek Voyager: Across the Unknown has seven different endings you can access, but most of them are locked behind certain prerequisites.
The ending you reach depends on the decisions you make. This guide will help you figure out all the endings that you can reach.
Table of contents
How to reach all endings in Star Trek Voyager: Across the Unknown
Before we deep dive into the ending, it’s crucial to keep your ship and crew in good shape. To do so, it’s best to create a manual backup file that will be helpful if something goes wrong.
- Manage your ship manually to prevent it from getting destroyed. It should be the obvious thing to do if you’re in a combat.
- Make sure to get a maxed-out warp core before you hit Sector 9.
- You’ll have to use the Vidiian medical device in Faces, but you’ll also need the same device in Sector 6 later. Hence, you’ll want to make sure not to burn the device on B’Elanna (assuming you want to go for the canonical ending).
- If you merge Tuvok and Neelix into Tuvix in the side mission titled Tuvic, you’ll lose the former permanently. This will automatically rule out the canonical ending.
With that out of the way, let’s now look at all the endings. Once you reach Sector 11, you have to decide what happens to Ralik. At this point, create a manual save. If you ally with Ralik, you open up five endings. However, the cost of the paths is extremely high. You have to enter Sector 12 with either 100 Ex-Borg crew and 35 Science Technology, or with a flat 400 pure combat power.
Save Ralik
During your run through Sector 12, choose to disagree with Ralik’s sacrifice to keep him alive. Once you’re past the point of no return, enter the nebula and engage the Borg Cube. From there, you can branch out to the following choices.
- Home, Hub and Holdfast: Don’t destroy the hub, and enter the aperture. Once inside, retreat after changing your mind, and agree to take over the hub with your forces.
- Welcome Home, Voyager: Reject the shortcut and plan to destroy the hub. Reject all crew sacrifices and collect the Borg Vinclum. This will allow you to develop the pathogen that destroys the hub.
- The Calm Before the Storm: For the third branch, follow all the steps as the one that destroys the hub. However, don’t try to save all your crew, and pick someone to die. Then, grab the Vinculum, and give up at the last second. The autopilot will fly you into the aperture, where you’ll be saved by Admiral Janeway (but the mission fails).
Don’t Save Ralik (For the Greater Good)
If you choose to sacrifice Ralik, you have to engage the cube then and plan to destroy the hub. Pick a crew member to sacrifice themselves, and then develop the pathogen. You’ll have to pass three skill checks to defy Admiral Janeway and reject her plans. If you don’t have the necessary stats, you’ll automatically fail the skill checks. If you succeed, you’ll destroy the hub, but leave the Voyager permanently stranded in the Delta Quadrant.
Universal Endings
There are two endings you can reach, irrespective of what you did with Ralik in Sector 11. To reach either ending, you need to get to Sector 12’s point of no return.
- The Long Road Continues: When you face the Borg nebula, refuse to enter it. Tell your crew that another way home has to be found, and fly your ship in the opposite direction. While it does add 15 more years of journey, you can avoid the Borg confrontation.
- Was It Worth It?: For this, you need to enter the nebula and decide not to destroy the hub. You’ll have to fight and defeat the Borg Queen before you reach home.
Conditional Endings
There are two conditional endings that require you to complete specific tasks. One of the two endings can be considered the true conclusion of the story if you’re following the canon.
- The Starfleet Way: Complete the final sector without depending on Borg architecture. Load your save before hitting the point of no return in Sector 12, and delete all Borg rooms from the ship’s layout. Complete all the return home paths with a clean vessel.
- The Canon: You reach Earth with the help of any successful path while ensuring the survival of Tom Paris, Chakotay, Tuvok, Harry Kim, B’Elanna Torres, The Doctor, Seven of Nine, and Icheb.
Incidentally, there’s a hilarious ending in the form of the Stick to the Prime Directive. This is the quickest ending you can reach during Sector 1. If you choose to use the Caretaker’s Array to warp back to the Alpha quadrant immediately, you’ll find the credits rolling as the game ends immediately.
The post All endings in Star Trek Voyager: Across the Unknown appeared first on Destructoid.
Recommended Story For You :
Think of it as a GPS system for World of Warcraft

FIFA 2023 ULTIMATE TEAM MILLIONS MADE EASY
Joana's Clssic WotLK 1-80 & Era 1-60 Speed Leveling Guides

Empowering Gamers with the Ultimate Secret Gold Guide
A Practical Guide For Tactical Gaming
Terra Game - Where Adventure Awaits!