Sensors have always been one of the more useful items to find in ARC Raiders, and their demand has gone up with the start of the Weather Monitor System project.
The new project, released as part of the Shrouded Sky update, provides you with different rewards. However, you’ll need to complete the stages that are part of the project. To do so, you need to submit different items, which also include sensors.
Let’s look at how you can find and use these items in ARC Raiders.
Table of contents
How to get Sensors in ARC Raiders
There are different ways to get Sensors. You can buy them in certain quantities daily, but more on that later.
You can get Sensors as loot from different spots on the map. While you can find them randomly while looting different containers, look in areas marked as Technological and Security. Those regions seem to have higher chances of containing Sensors.
I have marked the spots where I have found sensors during my raids. My favorite maps are Spaceport and Blue Gate, but you can also find them in other regions (including Stella Montis).
If you’re at Blue Gate, you should check Pilgrim’s Peak as the area has plenty of server towers. There’s a high chance these towers will provide you with Sensors. If you’re on Spaceport, the best location is the Launch Towers POI in the dead center of the map. Just like Pilgrim’s Peak, you’ll find plenty of broken-down machines and containers to loot.
If you’re on Dam Battlegrounds, you can always look for the Power Generation Complex in the northern part of the map. Shrouded Sky has added the Controlled Access Zone that you can search as well. I found Sensors there while trying to solve the puzzle exclusive to this location.
If you don’t want to depend on your luck, you can buy Sensors from Celeste in exchange for Assorted Seeds. You can buy at most five of them daily, and each costs 10 Assorted Seeds. You can always find Assorted Seeds from Scrappy.
Finally, several items can be recycled to produce Sensors.
- Broken Handheld Radio
- Radio
- Remote Control
- Radio Relay
- Spectrometer
- Spectrum Analysis
- Thermostat
You can also find Sensors from scavenging Snitches and Surveyors after destroying them.
How to use Sensors in ARC Raiders
For starters, you’ll need Sensors to produce the following items.
- Explosive Mine
- Raider Hatch Key
- Tagging Grenade
The Raider Hatch Key is exceptionally important during raids, so it’s always beneficial to find Sensors. However, you’ll also need to submit three Sensors to complete Stage 2 of the Weather Monitor System project. Doing so will also get you three Ziplines and bring you one step close to finishing the whole project.
The post How to get and use Sensors in ARC Raiders appeared first on Destructoid.
Rainbow Six Mobile is now available on mobile devices worldwide, and there are a fair number of operators to unlock at launch.
Operators in Rainow Six Mobile are broadly categorized into Attackers and Defenders. Suffice to say, every Operator is different in terms of how they operate. Despite the game being in its early days, some Operators are simply better.
This guide will help you figure out which Operators are pretty strong in the current meta, and which ones are best avoided at all costs.
Table of contents
Complete Rainbow Six Mobile Attackers tier list
To separate the Operators, I have used four different tiers.
- S-tier Operators are the best choices in their respective roles, and they’re extremely strong at launch.
- A-tier Operators are pretty close to the names on the S-tier, but they have a few weaknesses.
- B-tier Operators are strong characters to consider, but they’re not exactly meta.
- C-tier Operators are either clunky or just poor overall. They’re best avoided unless you’re a fan.
First, let’s look at the Attackers.
S-tier
| Name | Reason |
|---|---|
| Hibana | Hibana is the best breacher in the current roster, all thanks to her X-Kairos Launcher. She can breach fortified and softer walls equally well and open new areas for her allies. |
| Dokkaebi | Having information on your hand is crucial, and that’s where Dokkaebi comes in. While I don’t like the fact that you have to get at least one kill with her, the ability is absolutely overpowered. |
| Thatcher | Thatcher is arguably the best supporter in the entire game and his EMPs are great to disable opposition gadgets. This can put the enemy team on backfoot and hand your allies an unexpected advantage. |
| Lion | Similar to Dokkaebi, Lion can reveal enemy movements. His signature weapon helps to restrict the enemy movement, and you can also use it to corner isolated targets. |
A-tier
| Name | Reason |
|---|---|
| Thermite | Thermite is almost as effective as Hibana when it comes to breaching doors. However, his Exothermic Charges can be slightly clunky to handle, which puts him in the A-tier. |
| Twitch | She is one of the easiest characters to master as her Shock Drone auto-targets and disables enemy gadgets. She’s A-tier since the enemy can shoot at her when she’s controlling the drone. |
| Capitao | Since he can cover the enemy’s vision of the map, you can force your opponents to play in certain zones. This allows your allies to corner and flush them out for easy kills. |
| Ash | A solid breacher who can open up multiple entry-points and secure them due to her incredible speed. However, you’ll still need to master the art of rushing in, as timing it poorly can end with you getting killed instead. |
B-tier
| Name | Reason |
|---|---|
| Sledge | While Sledge is limited as a breacher due to the slow speed of his hammer, his melee ability makes it easy for you to learn the basics with him. |
| Deimos | This is one of the hardest attackers to master, and he also struggles when playing alone. Deimos can be considered as A-tier in a well-coordinated team. |
| Buck | Buck is the perfect example of an Operator who can do almost everything without specializing in any area. His ability to break soft surfaces without having to change his primary is really cool. |
| Ying | The Candela Flash Charge is amazing at blinding the enemy, but aiming it with precision is extremely difficult on a mobile device. You’ll also need other allies to max out its effectiveness. |
C-tier
| Name | Reason |
|---|---|
| Glaz | The Therman Flip Scope allows Glaz to see enemies in smoke, or when you’re hidden in smoke. The problem is the heavy reliance on smoke. If there’s no smoke, Glaz’s ability has zero value. |
| ATK Recruit | Good starting operator with an extra gadget, but should be replaced at the earliest possibility. |
Rainbow Six Mobile Defenders tier list
For Defenders, I have once again used a four-grade tier system, with similar logic behind every rank.
S-tier
| Name | Reason |
|---|---|
| Mira | Mira’s Black Mirror allows you to view enemies through soft and reinforced surfaces, which is such a fun ability to have. Moreover, the enemy will have no idea that you’re well aware of their movements. |
| Bandit | Arguably the best Defender in the current meta, his Shock Wires are absolutely stunning. The gadget can nullify almost all Breacher abilities and prevents them from breaking the surface. |
| Mute | He becomes a must-have if the opposition has Dokkaebi. Mute can deny all opposition information with his drones. His jammer also activates against enemy gadgets that can be detonated remotely. |
| Maestro | Maestro’s Evil Eye is great at detecting enemies with its laser, and the high durability is a bonus. |
A-tier
| Name | Reason |
|---|---|
| Smoke | Smoke is a classic Defender who uses his Gas Grenade to keep enemies from entering specific areas. The effects last for a decent amount of time. |
| Jager | Jager has one of the simplest gameplay. Once you plant his Magpie Defense Systerm, it’s job done. Your remaining task is to hold the strategic points and shoot at the opposition attackers. |
| Kapkan | Kapkan’s Entry Denial Device is a brilliant hybrid that can either hinder enemy movement, or even get kills (thanks to the five charges). |
| Frost | Her Welcome Mats, if placed properly, can restrict enemy Attackers for the rest of the Round. However, the placement is key to maximize their effects. |
B-tier
| Name | Reason |
|---|---|
| Caveira | If you’re good at takedowns, Caveira is S-tier. She can locate all enemies by completing an interrogation (which requires you to take down a single enemy). |
| Valkyrie | While her Black Eye Camera can provide information to the team, it takes a lot of time to set them up effectively. Sometimes, rounds might be over before you can properly set up all her cameras. |
| Castle | His Armor Panel is great at slowing down enemies when they’re trying to push on to the objective. |
| Rook | A very basic Defender who has extra HP to take more damage. However, he is slightly slow to move. |
C-tier
The DEF Recruit is a good operator to learn the role of a Defender, but he doesn’t have much use otherwise.
The post Rainbow Six Mobile Operators tier list appeared first on Destructoid.
Recommended Story For You :
Think of it as a GPS system for World of Warcraft

FIFA 2023 ULTIMATE TEAM MILLIONS MADE EASY
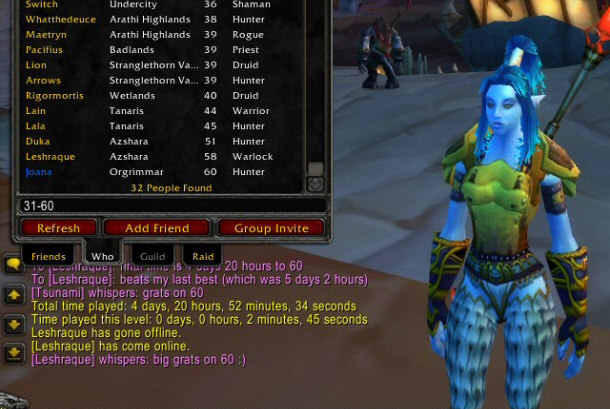
Joana's Clssic WotLK 1-80 & Era 1-60 Speed Leveling Guides

Empowering Gamers with the Ultimate Secret Gold Guide
A Practical Guide For Tactical Gaming
Terra Game - Where Adventure Awaits!