All around the many maps you’ll venture to while battling throughout Marvel Rivals, there are plenty of secret features you can interact with, many of which are tied to completing achievements. One of the tougher ones to get done is Cellblock Chat.
This achievement involves interacting with notorious villain Wilson Fisk, otherwise known as Kingpin. He’s not an easy character to track down, though, so here’s how to get the Cellblock Chat achievement in Marvel Rivals.
Table of contents
How to complete Cellblock Chat in Marvel Rivals
To complete the Cellblock Chat achievement in Marvel Rivals, you need to have a chat with Kingpin while deep in the Vault in Lower Manhattan. He’s a pretty tough guy to find, and only one team can access him per round, so this is a fairly tricky achievement to check off. Here’s a full breakdown of how to make it happen.
- Visit the Lower Manhattan map. You have no control over which map is selected in any given round, so this ultimately comes down to luck. Play frequently to increase your chances.
- Be on the defending team. This also comes down to luck, as you can’t actually choose which side you’re on. You can only chat with Kingpin when you’re on the side that is defending the convoy, not the one that’s pushing it forward, so if you’re not on the right side, you’ll have to wait and try again in another match. You’ll know you’re on the right side if you see the “Prevent Kingpin from obtaining the Tablet of Life and Time and foil the prison break” message in the upper left corner when selecting your character.
- Let the enemy team make it past the first checkpoint. Since you’re on the defending team, this will feel counterproductive, but letting the convoy get past the first checkpoint is the only way to unlock the vault room with Kingpin. You’ll know you’ve successfully done it when the enemy team gets the convoy to the front of the prison. You can also keep an eye on the progress bar near the upper-middle section of the screen.
- Locate the Vault. The quickest way to find it is simply dying once the convoy reaches the prison, as you’ll respawn in the Vault with Kingpin by default. If you don’t want to die, though, you’ll need to make your way to the very end of the convoy path. Look for the massive “Fisk Can Fix It” propaganda poster sitting right between two spawn room doors. Head inside either one to enter the Vault.
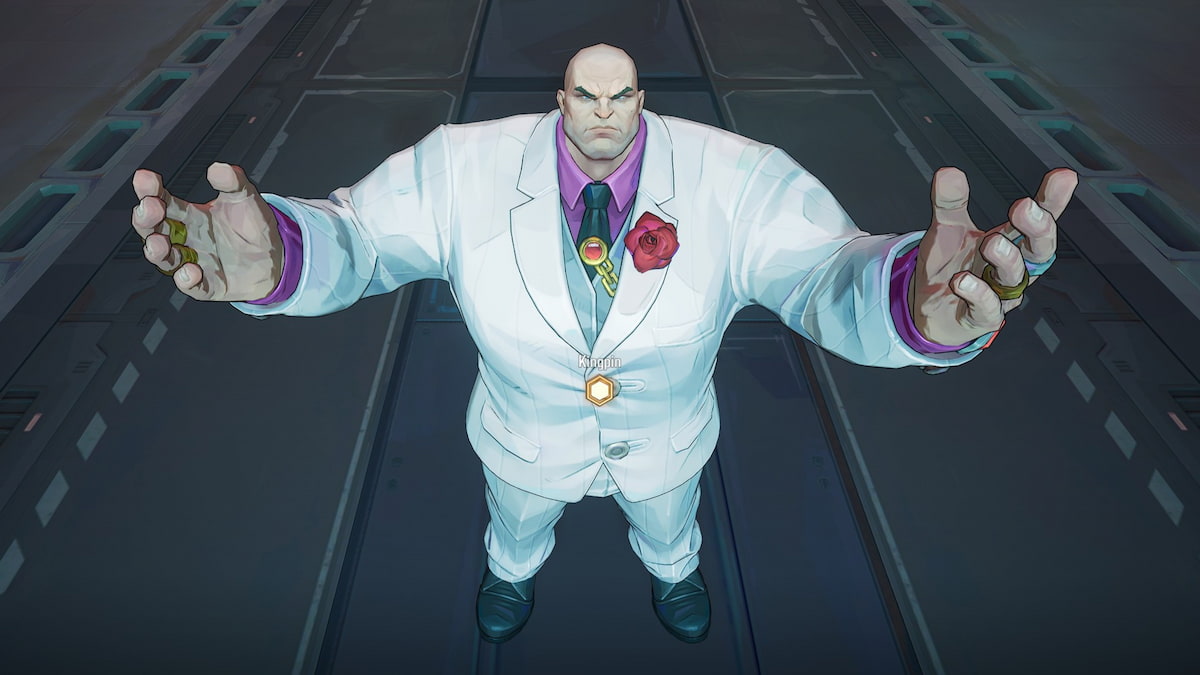
- Chat with Kingpin. Once you’re in the Vault, walk over to the back of the room to find Kingpin standing underneath the massive hand. Interact with him to initiate a chat, thus successfully checking off the Cellblock Chat achievement.
Where to find Kingpin in Marvel Rivals
Kingpin can be found in the Vault, which is the respawn room of the defending convoy team that can be accessed once you get past the first checkpoint on the Lower Manhattan map. This room is located at the very end of the convoy path, near the back of the prison section.
He can only be visited and interacted with if you are part of the team that is trying to stop the convoy from progressing, but you also need the convoy to move up at least to the prison section for the Vault to unlock. Before the convoy reaches the prison, the respawn room is different, which means the Vault with Kingpin is locked and inaccessible until the vehicle reaches this point.
Chat with Kingpin deep in the Vault in Lower Manhattan in Marvel Rivals
The Cellblock Chat achievement simply asks you to chat with Kingpin deep in the Vault in Lower Manhattan, which can be done by interacting with him once you reach this point. The act of chatting with him is easy enough now that you know where to look.
There’s plenty more to explore in Marvel Rivals after checking off this tricky feat. Next, you might consider checking out all Museum of Contemplation Easter eggs and references or working through some other tough achievements like Secret Stash, Days of Future Past, Arrako Goes Analog, and Whispers in Pieces.
The post How to get Cellblock Chat achievement in Marvel Rivals appeared first on Destructoid.
Prototype gears have arrived in The Division 2 with the start of Year 8 Season 1, and they currently sit at the top of all types of weapons/armors. Gears belonging to this item quality sit above High-End, Named, and other set items, making them truly unique.
Let’s find out how you can get these elusive items to improve your arsenal.
Table of contents
How to obtain Prototype gears in The Division 2
To obtain Prototype gears, you’ll need to participate in missions belonging to the Escalation mode. This is a new difficulty to complete missions that you’ve previously completed inside the game. Every week will have a set number of missions to finish.
There are ten different tiers for each mission. The higher the difficulty, the better your chances of getting Prototype gears. However, you can also get more of these items via the route of upgrades.
How to upgrade to Prototype gears in The Division 2
You can upgrade items starting from High-End quality to Prototype gear. To do so, you’ll need a Prototype Core. The cosen item must also be at the maximum Expertise level (30), and the item must be at maximum level (40). The item doesn’t need to be full optimized for the conversion.
Once you change an item to Prototype gear, it can no longer be optimized or recalibrated. Hence, pay full attention to its stats before spending the Prototype Core on it. However, the upgrade is worth it since your gear will improve its stats and also gain augments.
Here’s a list of augments that are currently available.
- Quantum – Provides a small chance to become temporarily immune to damage.
- Echo – Each bullet fired has a chance to deal its damage a second time.
- Atomize – Increases grenade radius and damage.
- Amalgam – Each bullet hit has a chance to apply a random status effect.
- Trapper – Increases the duration of status effects you apply.
- Entropy – Increases your Health based on a percentage of your total Armor.
- Anomaly – Skills restore a portion of the damage they deal as healing.
- Paradox – Provides a chance to refill part of your magazine while firing.
- Synesthesia – Bullet hits have a chance to slightly reduce skill cooldowns.
The post How to get Prototype gear in The Division 2 appeared first on Destructoid.
Recommended Story For You :

Think of it as a GPS system for World of Warcraft

FIFA 2023 ULTIMATE TEAM MILLIONS MADE EASY

Joana's Clssic WotLK 1-80 & Era 1-60 Speed Leveling Guides

Empowering Gamers with the Ultimate Secret Gold Guide

A Practical Guide For Tactical Gaming

Terra Game - Where Adventure Awaits!